Supplying artwork: tips for perfect printing

When printing your sustainable gifts, some technical terms come into play. We ask for vector files and PMS colours, and talk about bleed and solid fills. In this blog you’ll read all about the printing jargon and get practical tips for supplying artwork.
What are PMS colours?
PMS stands for Pantone Matching System. This colour system gives every unique colour its own number. Because this numbering is recognised worldwide, the colours of your print work will always look the same at every print shop. Choose your colours from the PMS colour chart, note the numbers and you’ll always get the same result. PMS is especially useful for print jobs with only a few colours, for example a logo in 1 or 2 colours.

How to find the PMS colours of your logo
Not sure about your logo’s PMS colours yet? Check the PMS colour chart and find the colours of your logo or design. Write the numbers down straight away so you won’t need to search again next time.
The difference between PMS and CMYK (full colour)
PMS is generally used when only a few colours are needed. For multi-colour print, CMYK (Cyan, Magenta, Yellow, Key/Black) is often used. This method mixes four colours during printing. The result is less predictable than PMS but allows for many more colour variations. Full colour is suitable for photos or logos with gradients or multiple colours.
How to create a CMYK file 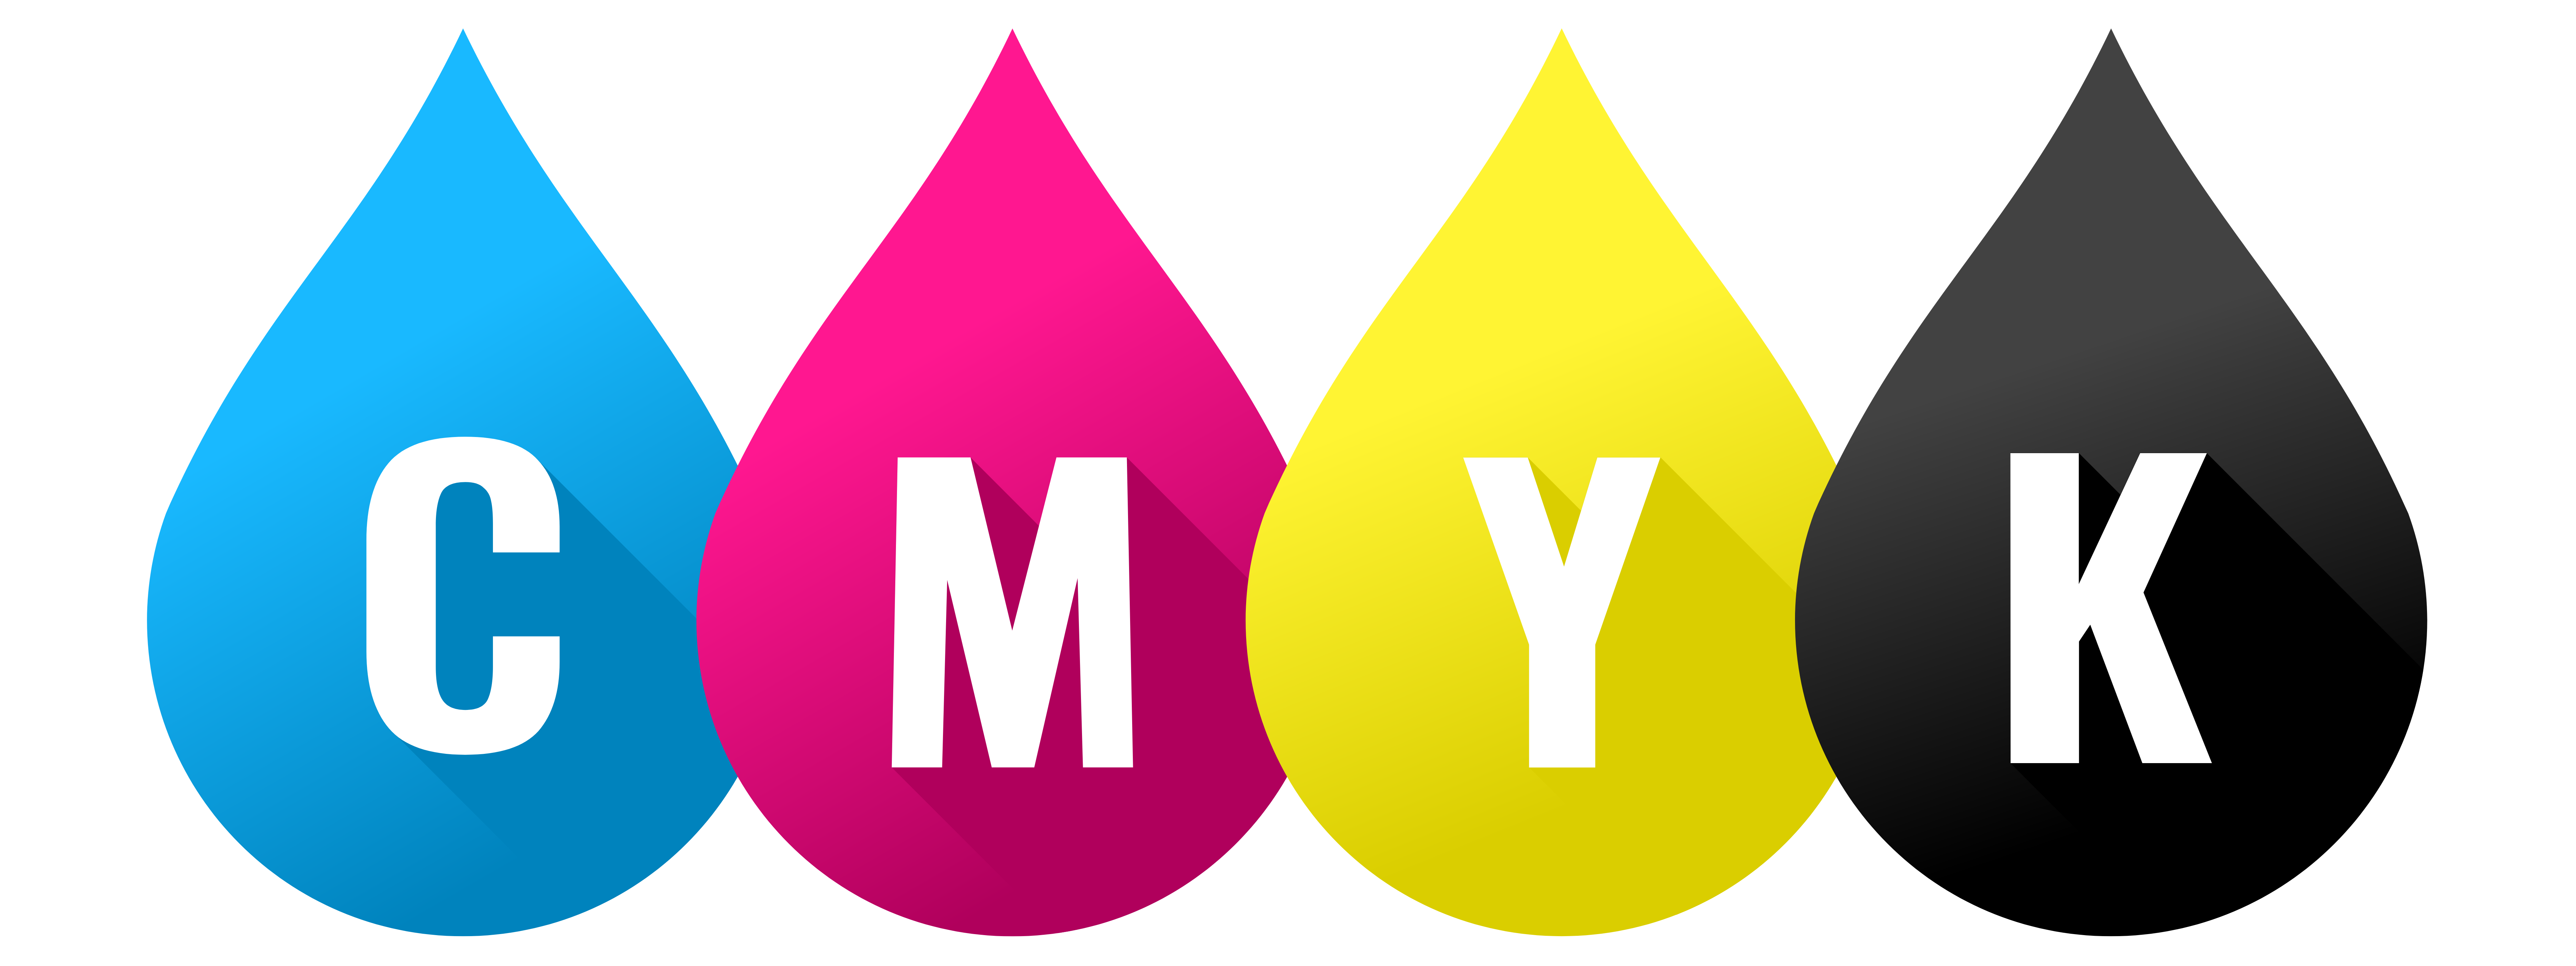
For full colour printing (like Doppers), supply your logo or design in CMYK. In Adobe Photoshop go to Image > Mode > CMYK. In Adobe Illustrator go to File > Document Color Mode > CMYK Color.
What is a vector file?
When supplying your logo, we ask for a vector file. This is a graphic built from vectors. Unlike pixel files such as JPG or PNG, a vector image can be scaled infinitely without losing sharpness. Common formats are AI, EPS or PDF. Note: not all AI, EPS, or PDF files are vector-based. Check by enlarging: if it stays sharp, it’s a vector. If it becomes blurry and shows pixels, it’s not.
How to get a vector file
- Ask your logo designer; they can quickly provide it.
- Open your image in Adobe Illustrator or InDesign and trace it manually, then save as AI, EPS or PDF. This requires some design experience.
- Still stuck? Let us know — we might be able to help!
What are text outlines?
Logos or texts are usually set in specific fonts, part of your brand identity. Each font has its own file, but not all fonts are installed on our systems. If your font isn’t available, the text will be replaced automatically, resulting in a different look. To prevent this, we use text outlines. This converts the font into an image, so we see exactly the same font you intended.
How to convert text into outlines
In Adobe Illustrator or InDesign select your text, then go to Type > Create Outlines (or use Ctrl + Shift + O). Save the file and send it to us. Need help? Just let us know!
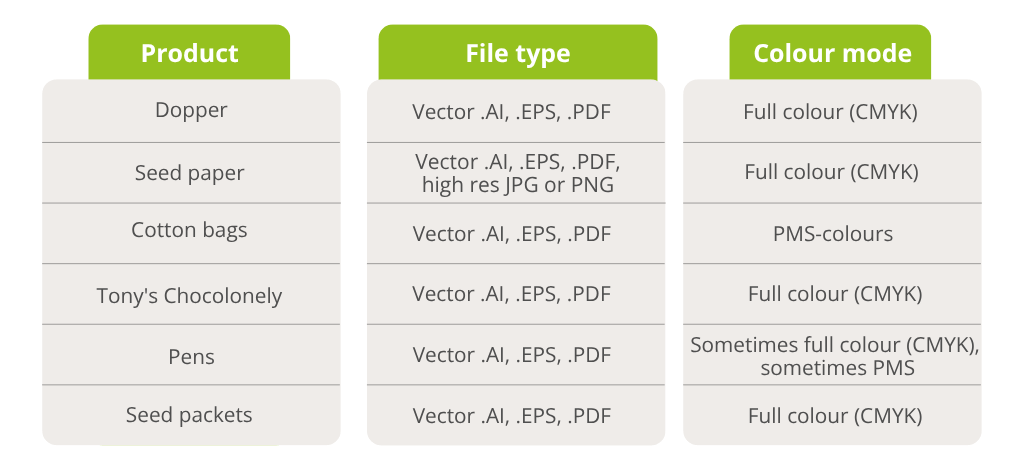
How to supply your artwork?
For each product we have listed how to supply your file:
Crop marks and cutting lines
Printed products such as seed paper need to be cut. You can prepare your file with crop marks and cutting lines in software like Adobe InDesign and Illustrator. These black corner lines ensure correct trimming, preventing white edges or missing parts.
What are solid fills?
Because products like seed paper contain seeds with a rough surface, it’s not possible to cover the entire area with ink. Large fills may cause streaks. We recommend printing no more than 30% of the surface area.
What is bleed printing?
Bleed printing means images or text extend right to the edge of the paper. It’s possible to print seed paper with bleed. Always keep at least a 3mm white margin in your design.
Need help? 
You should now be ready to place your order. If you still have questions, we are happy to assist you!
Follow us on social media
Be the first to hear about our news
Popular blogs